Custom Article Templates
Using Article Templates to create consistent layout for your Joomla articles is very powerful. Think of batch updating and logic in your content as a few examples.


A few points to take into account
- Start using your custom templates immedialtely!
- Make sure you have created a F2C Content Type and added some custom fields.
- Maybe have the html of the article layout you want to create as an example.
- Article Templates can be very very simple, as we will show, so don't be too intimidated if your html knowledge is limited.
- We use the Smarty template system because it's easy and powerful.
Two templates and 'read more', how does it work?
Some Joomla history: The 'read more' function in Joomla has a long, somewhat important history which has effect to this day. In Joomla (up until 2.x) there was one editor for an article but "underwater" (i.e. in the database) there where 2 database fields, one for the intro and one for the main content of the article....as a result Form2Content required two separate Article Templates. The intro template and the main template.
Read more link
In Joomla the 'read more' link in the category blog layout is automatically shown when an article has a read more tag. Since you are now using Article Templating you don't need to add this anymore, Form2Content will add this.
Why does it work this way?
There are two reasons why F2C works this way. First reason is the above one and can be seen as Joomla legacy. The second reason is more important. We want the web developer to determine where the read more tag is added, not the user.
Step 1: Create your two custom templates
From verzion F2C LITE 5.6.0 and PRO 6.17 onwards
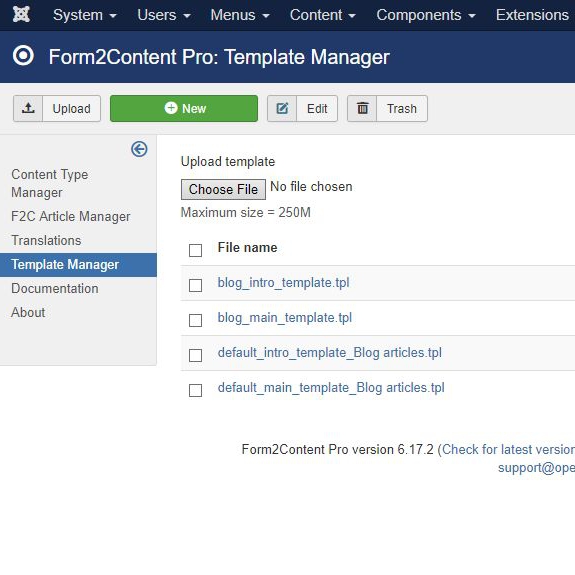
Step 1) Navigate to the Form2Content Template manager (image 1)
Step 2) Click on NEW and give your intro template a logical name like intro_news or intro_blog and click on SAVE.
Step 3) Repeat for the main template.
OLD situation
Create two files (.tpl or .htm(l)) with any name on your computer. The first will be the template for your introduction text (which you see in Joomla in the category blog layout) and the second for the main body (Joomla article). Preferable extension is .tpl.
custom_intro.tpl
custom_main.tpl
NOTE: If you leave the second template empty or don't link to it, it will have the same effect as when you DON'T use a read more tag in your Joomla article.
Step 2: Add your layout and template parameters
Your custom templates need to show the data from your custom forms. This is done using Template Parameters.
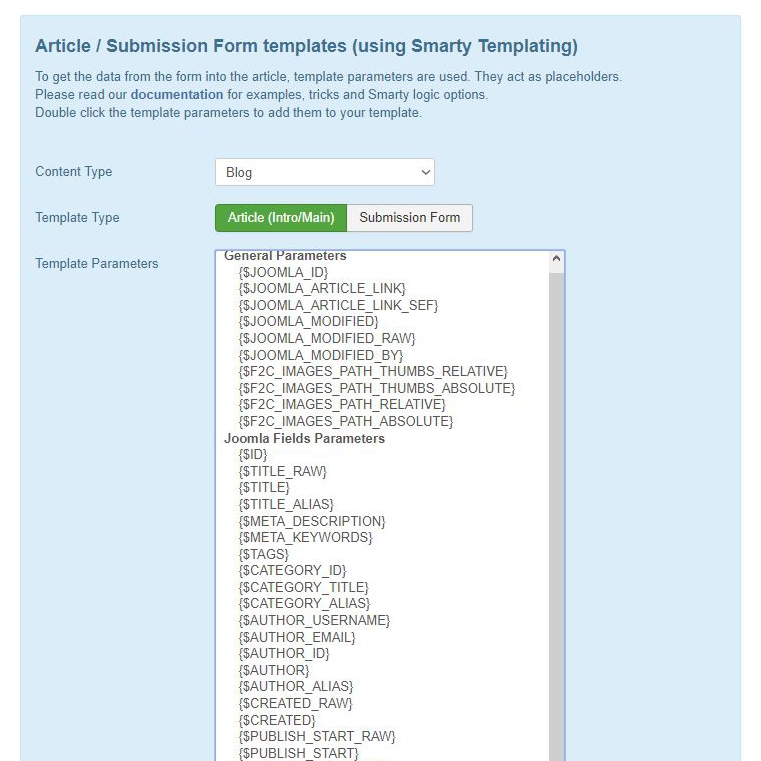
In the template manager open your custom template. You can now directly add all the available template parameters into your custom template. In the right column (image 2) select your F2C Content Type you are working on. All available template parameters will become visible. Double click to add them in the template.
Example:
Let's assume we build our form with two text area fields called intro_text and main_text and an image field called intro_image (set to RAW output!!).
Intro template could be as simple as:
<div class="f2c_intro">
{if $INTRO_IMAGE}
<img src="/%7B$INTRO_IMAGE%7D" align="right" alt="{$JOOMLA_TITLE}" />
{/if}
<p>{$INTRO_TEXT}</p>
</div>
And the main template:
{if $MAIN_TEXT}
<div class="f2c_main">{$MAIN_TEXT}</div>
{/if}Step 3: Using/linking to your custom templates
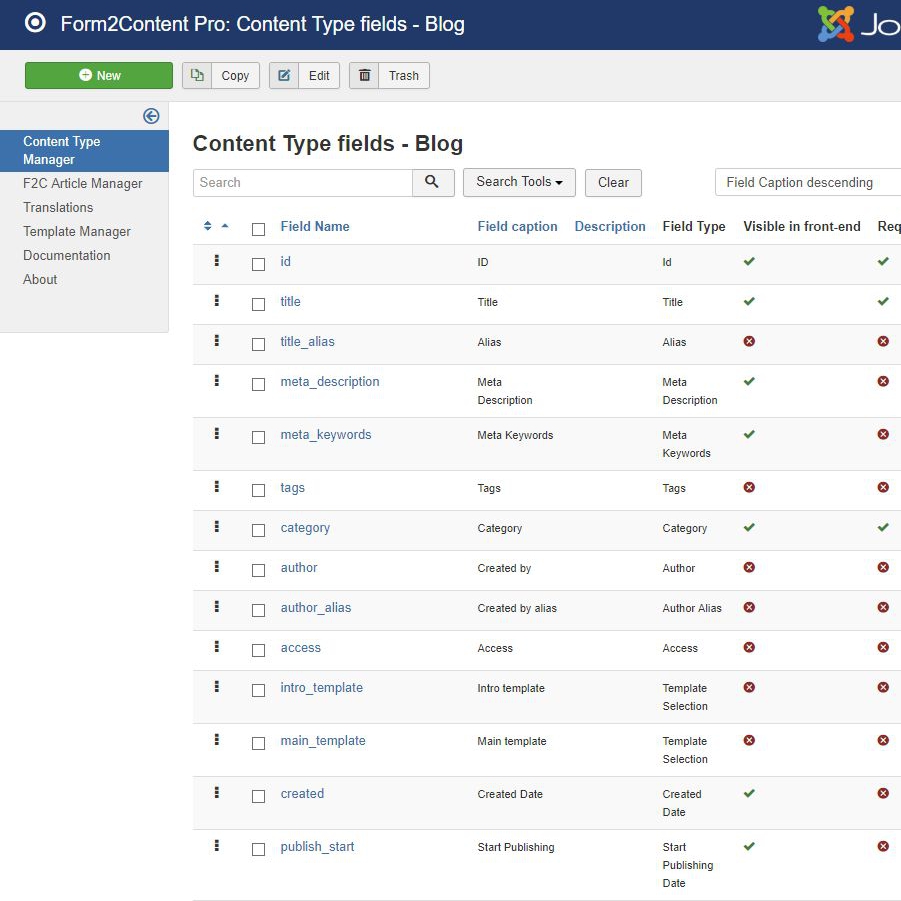
There are two F2C Fields called intro template and main template for each F2C content type. Within these you can link your template
Menu: Components => Form2Content => Content Type Manager , select the fields manager. (image 3)
In the field manager edit the two template fields and select your custom template.
SAVE your changes.
Step 4: Check your generated HTML
Whenever you generate a new article using Form2Content you create a 100% Joomla article. The data from the submisison form is pasted into the template and the resulting HTML is used to create the Joomla article.
Form data + layout (article templates) = Joomla article HTML
To check the outcome of your F2C article template simply navigate to the Joomla Article Manager (JAM) and open the article you made. Use the html editor in code view to check your html. Please remember, any changes made in a F2C generated Joomla article via the JAM will be lost once you save the article via F2C as it overwrites it.